Publishing MediaCentral Assets to a WorldNow CMS
If you have configured a WorldNow CMS profile, you can add information corresponding to some of the fields available in WorldNow. When you publish to the Web, you also have the option of publishing a Web story using an iNEWS story or a standalone video with a summary added separately.

If your MediaCentral administrator has configured the WorldNow settings in the System Settings layout, some options in the Web Story pane display with default values when you load an iNEWS story or when you attach video or images.
To publish a story from iNEWS to WorldNow CMS:
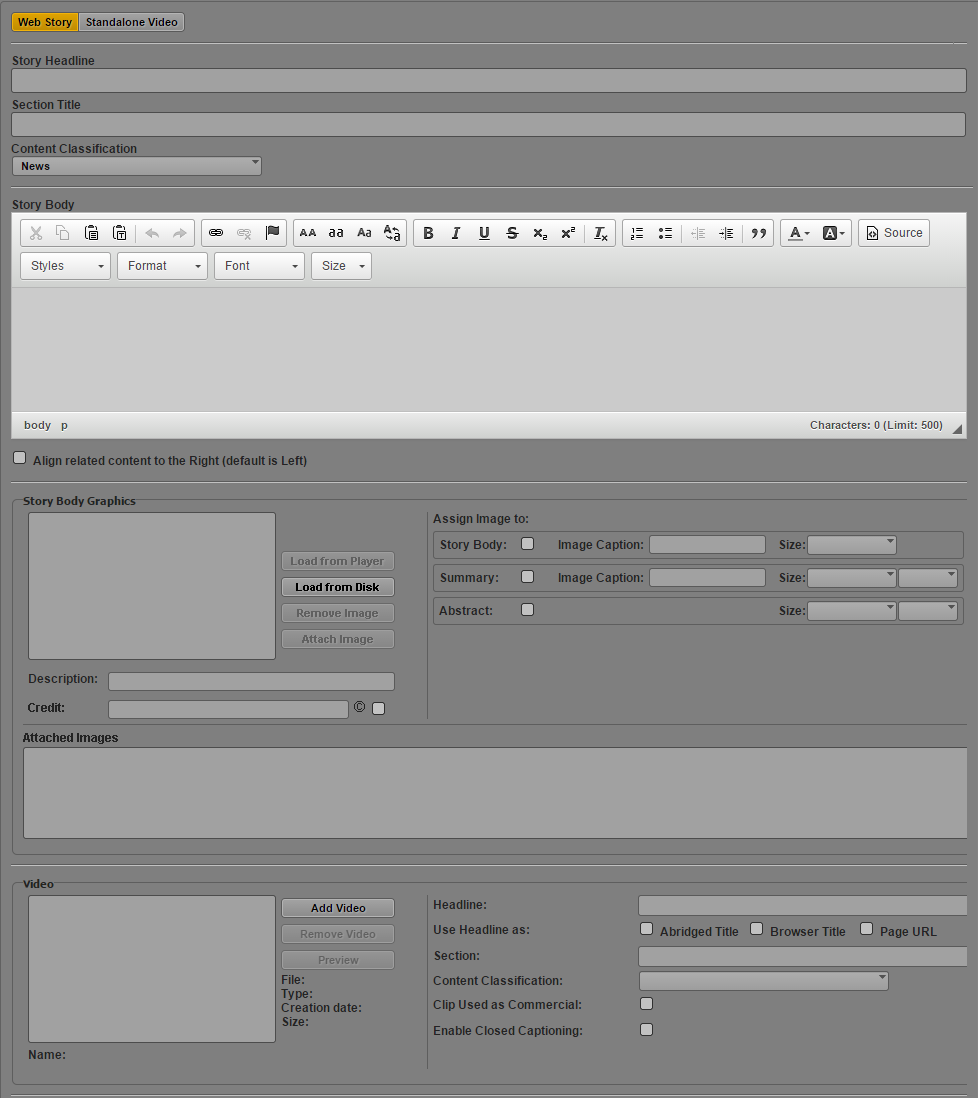
2. Click Web Story.
The Web Story pane displays the WorldNow fields.
3. At the bottom of the Web Story pane, click the Select Profile menu and select your WorldNow profile.
4. Click Load iNEWS Story.
The Story Headline text box displays the story slug, and the Body text box displays the iNEWS story, including all segments. If you selected the option to transform iNEWS stories to lowercase in the System Settings, all text changes to lowercase characters.
5. (Optional) Revise the text in the Story Headline, Section Title, and Story Body text boxes.
6. Click the Content Classification menu, and select one of the categories for your story.
7. To add a frame from your video or a separate image as a graphic to the body of your story, do the following in the Story Body Graphics section:
a. Move the position indicator in the Media viewer and then click Load from Player. You can also use a separate image from your local system by clicking Load from Disk.
The image appears in the Story Body Graphics section.
b. In the Assign Image to section, select in which part of the Web story you want your image to display, add the caption for the image, and select the size and alignment of the image from the Size menus.
c. Type a description of the image in the Description text box and add a copyright credit, if appropriate.
d. Click Attach Image.
The selected image appears in the Attached Images section, with the part of the Web story listed.
e. (Optional) If you want to add more images, repeat these steps. You can add up to five images for the Story Body Graphics section.
8. To add a video for your story, do the following in the Video section:
a. Load a video clip in the Media pane, and then click Add Video.
The video appears in the Video section, and the metadata fields are filled with the appropriate information.
b. Type a headline for the video in the Headline text box, and select where you want the headline to appear.
c. Type a title for the section the video appears in your Web story.
d. Click the Content Classification menu, and select one of the categories for your story.
e. Select the options to mark the clip for use in a commercial and to enable closed captioning.
You can remove closed captioning by clicking Remove Closed Captioning.
9. If you want to add links to relevant Web pages to your story, do the following in the Associated Links section:
a. In the Link Name text box, type the name of the link to appear in your Web story.
b. In the Link Addr text box, add the URL for the link you want to add, and then click Add Link.
10. Click Send draft.
The story is sent for approval and the Web Story pane clears all fields. For information on approving stories for publishing, see
Review and Approval.
To publish a story media packages to WorldNow CMS:
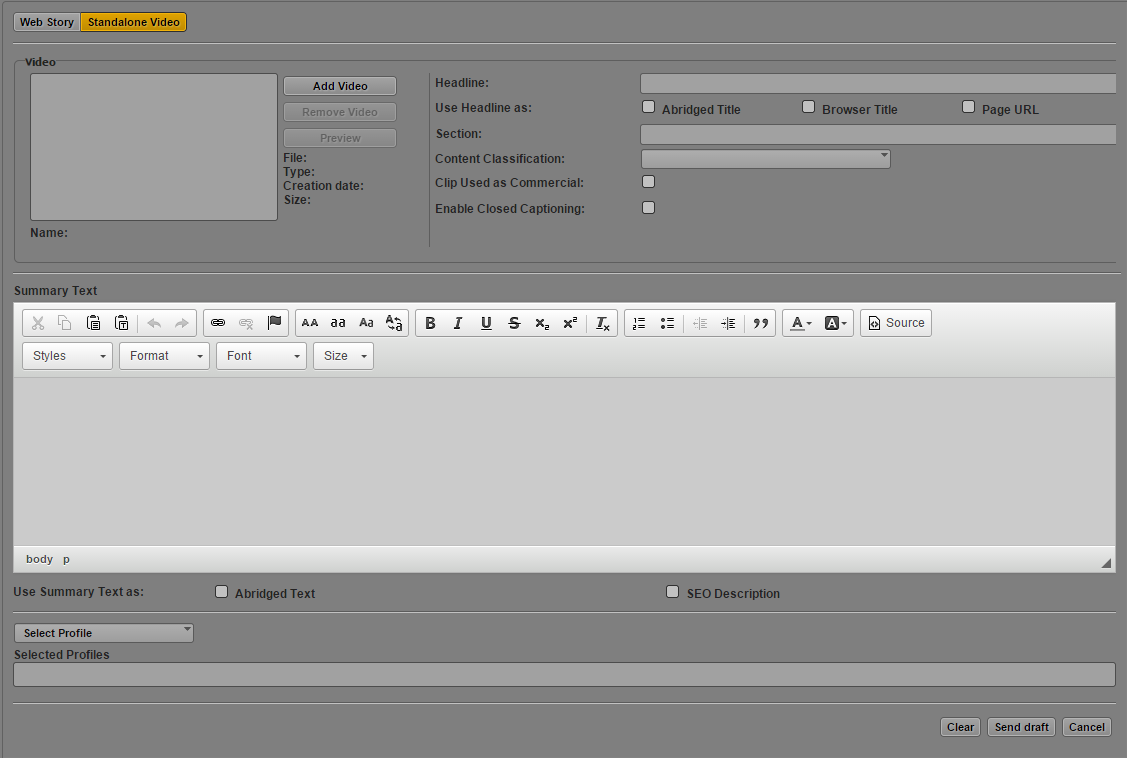
2. Click Standalone Video.
The Web Story pane displays the WorldNow fields.
3. At the bottom of the Web Story pane, click the Select Profile menu and select your WorldNow profile.
4. To add a video for your story, do the following in the Video section:
a. Load a video clip in the Media pane, and then click Add Video.
The video appears in the Video section, and the metadata fields are filled with the appropriate information.
b. Type a headline for the video in the Headline text box, and select where you want the headline to appear.
c. Type a title for the section the video appears in your Web story.
d. Click the Content Classification menu, and select one of the categories for your story.
e. Select the options to mark the clip for use in a commercial and to enable closed captioning.
You can remove closed captioning by clicking Remove Closed Captioning.
5. In the Summary Text section, do the following:
a. Type the text you want to accompany your video. The Summary Text section provides you with a rich text editor to style and edit your summary.
b. Select the appropriate option to use the summary as abridged text or as an SEO description.
WorldNow has a 500-character limit for text in the Summary Text section.
6. Click Send draft.
The story is sent for approval and the Web Story pane clears all fields. For information on approving stories for publishing, see
Review and Approval.