Publishing MediaCentral Assets with the Generic CMS Extended Profile
If you have configured a Generic CMS Extended profile, you can use the Generic CMS Extended pane to add information to a range of fields to extend the data published with your media package.
To publish media packages using the Generic CMS Extended pane:
1. Click the Layout selector and select Media Distribute.
The Media Distribute layout opens.
2. Do the following to load an asset in the Media pane.
a. Double-click an Interplay Production server in the Launch pane.
The folder hierarchy of the MediaCentral database displays in the Assets pane.
b. Navigate to a sequence in the Asset pane, and then double-click the asset or drag it to the Media viewer.
For information on opening media in the Asset pane, see “Navigating the Interplay | Production Database” in the Avid MediaCentral | UX User’s Guide.
The asset opens in the Media pane.
c. If you do not want to add the entire video to your package, set In and Out points in the Media pane and create a subclip and then load the subclip in the Media viewer.
3. Click the Panes Menu button and select Generic CMS Extended.
The Generic CMS Extended pane opens.
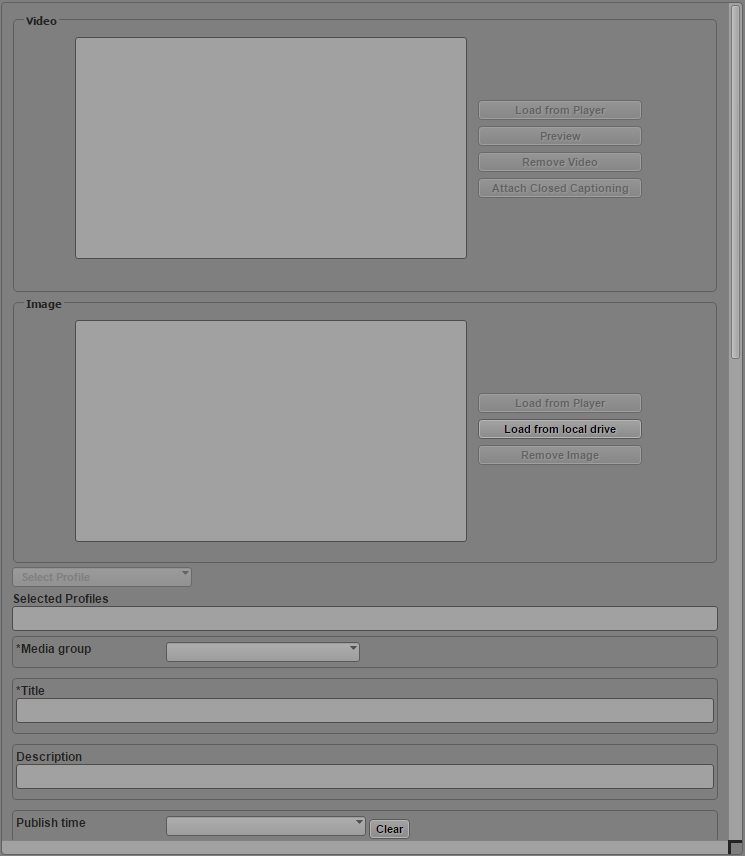
4. Load a video clip in the Media pane, and then click Add Video.
The video appears in the Video section, and the metadata fields are filled with the appropriate information.
5. If your video includes closed captioning information, click the Attach Closed Captioning button.
Closed captioning information is added to the media package, and the Attach Closed Captioning button changes to the Remove Closed Captioning button. You can remove closed captioning from your package by clicking Remove Closed Captioning.
6. (Optional) If you want to use a separate image to display in the Image area as the poster frame for you video, place the position indicator in the Media player at the desired frame or load a new video in the Media viewer, and then click Load from Player. This allows you to use a poster frame that does not appear in the video for your package. You can also use a separate image from your local system by clicking Load from local drive.
7. Click the Select Profiles menu and select your Generic CMS Extended profile.
The category options defined by your publishing profile load in Generic CMS Extended pane.
8. Set the options you want to use for your published video package in the supplied fields.
The following options represent some of the standard media fields for the Generic CMS Extended profile.
You can click Reload Metadata to automatically fill fields that correspond to the information in the Metadata pane for the video asset.
Option | Description |
Media Group (required) | The media group category for the video, set in your Generic CMS Extended profile |
Title (required) | The title of the story |
Description | A description of the story |
Publish Time | Loaded by default with the value of the creation date of the asset when you add a video or an image from the Media viewer. You can modify this value using the Publish Time menu or by typing a date. Depending on the your CMS configuration, you can use the Publish Time value to publish your media package to the Web, |
Body Text | Text associated with the video |
Tags | The metadata tags that you want to associate with the story and the video |
Name | Loaded by default when you load the video or select Reload Metadata. You can change the name displayed for the video. |
Comments | Loaded by default when you load the video or select Reload Metadata if the Comments field in Interplay Production contains text. You can modify the comments displayed for the asset. |
Video ID | Loaded by default when you load the video or select Reload Metadata if a video ID has been assigned to your asset. |
9. Click Save.
The package is saved for publication to your CMS. If the package has been set to auto-approval, the CMS publishes the package depending on the details of your configuration.