Publishing MediaCentral Assets to thePlatform
If you have configured a profile for thePlatform, you can add information corresponding to some of the fields available in thePlatform mpx system.
When you select a publishing profile in the thePlatform pane, any custom categories that have been defined in thePlatform CMS and in the profile settings are automatically loaded in the pane.
To publish a story media packages to thePlatform:
1. Click the Layout selector and select Media Distribute.
The Media Distribute layout opens.
2. Do the following to load an asset in the Media pane.
a. Double-click an Interplay Production server in the Launch pane.
The folder hierarchy of the MediaCentral database displays in the Assets pane.
b. Navigate to a sequence in the Asset pane, and then double-click the asset or drag it to the Media viewer.
For information on opening media in the Asset pane, see “Navigating the Interplay | Production Database” in the Avid MediaCentral | UX User’s Guide.
The asset opens in the Media pane.
c. If you do not want to add the entire video to your package, set In and Out points in the Media pane and create a subclip and then load the subclip in the Media viewer.
3. Click the Panes Menu button and select thePlatform.
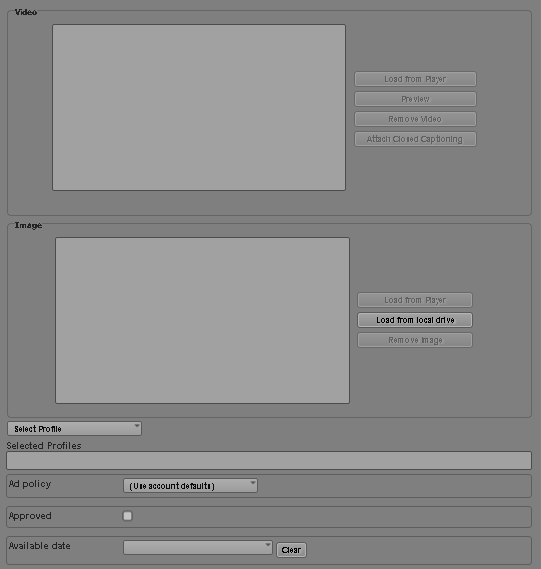
thePlatform pane opens.
4. Load a video clip in the Media pane, and then click Add Video.
The video appears in the Video section, and the metadata fields are filled with the appropriate information.
5. If your video includes closed captioning information, click the Attach Closed Captioning button.
Closed captioning information is added to the media package, and the Attach Closed Captioning button changes to the Remove Closed Captioning button. You can remove closed captioning from your package by clicking Remove Closed Captioning.
6. (Optional) If you want to use a separate image to display in the Video area as the poster frame for you video, load a new video in the Media viewer and then click Load from Player. This allows you to use a poster frame that does not appear in the video for your package. You can also use a separate image from your local system by clicking Load from local drive.
7. Click the Select Profile menu and select your thePlatform profile.
The category options defined by your publishing profile load in thePlatform pane.
8. Set the options you want to use for your published video package in the supplied fields.
thePlatform supports custom fields, and the options that display in thePlatform pane depend on your configuration. The following options represent some of the standard media fields for thePlatform. For more information, see
help.theplatform.com.
Option | Description |
Ad Policy | The ID of the AdPolicy associated with the content. This value is a Uniform Resource Identifier (URI) associated with the ad policy that specifies how you want ads to be applied to your content. |
Approved | Whether the video is approved for playback |
Available Date | The date that the video is available for playback |
Categories | The Category metadata tags that you want to associate with the video |
Countries | The list of ISO 3166 country codes that any geo-targeting restrictions apply to |
Description | A description of the video |
Exclude Countries | Whether the specified countries are excluded from playing the video |
Expiration Date | The date that the video expires and is no longer available for playback |
GUID | An alternate identifier for the video that is unique within your thePlatform account |
Publish Date | The original release date or air date of the video content |
Restriction Id | The ID of the Restriction associated with this content. This value is a URI associated with the Restriction for the video. |
Text | Text associated with the video |
Title | The name of the video |
9. Click Save.
The story is saved and sent for approval, and thePlatform pane clears all fields. For information on approving stories for publishing, see
Review and Approval.