Creating Assets
By default assets are created by ingests, watch folder imports, or import processes in Interplay MAM. You can also create new assets in the Interplay MAM database manually from the Assets pane. This action additionally creates a reference to the asset in the selected folder. The asset you create is a “placeholder” asset: It contains metadata but it does not contain any essence, such as a video or audio file. Upload the essence file to the new asset in a subsequent procedure.
Note the following limitations:
• You can create assets only if you have the proper permissions in Interplay MAM.
• The folder configuration in Interplay MAM must allow creating assets.
• Your ability to upload files depends on Interplay MAM user privileges and rules.
• Individual features offered during file upload, such as Caption Extraction and Quality Check, require the corresponding packages being installed on your Interplay MAM system.
To create a placeholder asset:
1. Select a folder.
2. Do one of the following:

Right-click and select Create Asset.
Click the Pane Menu button and select Create Asset.
The Asset Details dialog box opens.
3. Select the type of the asset to be created from the Asset Type list. The list shows all asset types that you are allowed to work with.
The fields of the metadata template configured for the selected asset type are shown.

If you have already entered data on the template and then select another asset type, the previously entered data is lost when the new template opens.
4. Type the main title for the new asset in the Main Title field.
5. (Optional) Supply optional information in the Asset Details dialog box. For information on the different types of metadata fields that you might encounter, see
Property Types and Input Controls.
6. Click Create to create the asset and keep the Asset Details dialog box open. This allows you to continue creating assets.
The asset is created in the MAM database and a reference to the new asset is created in the selected folder. The folder is updated and shows the new asset reference. An “asset created successfully” message opens.
7. Close the “asset created successfully” message.
8. (Optional) Create additional assets.
9. Click Cancel to close the Assets Details dialog box.
The asset type you selected in the Asset Details dialog box is saved as user setting and persists from one session to another. When you open the Asset Details dialog box the next time, the last used assets type is preselected.
The asset you created is a “placeholder” asset: It contains metadata and you can search for it in the Search pane, but it does not contain any essence, such as a video or audio file. Upload the essence file to the new asset, as described in the following procedures for video and non-video assets.
To upload a video essence to a video asset:
1. Select the new video asset.
2. Do one of the following:
Right-click a selected asset and select Actions.
Click the Pane Menu button and select Actions.
3. (Optional) Select the MAM system on which the process is to be created.
4. Select the Upload Video process type.
The Upload Video process creation dialog box opens. It shows the asset to which you upload the file as an asset card. The dialog box provides preset process options and metadata fields. You can leave the default values unchanged or adapt the fields before you upload the essence file.
5. (Optional) Provide settings for the Upload Video process.
- Provide a name for the process in the Main Title field. This name is shown in the Progress pane. If you do not type a title, “null” is shown as process name in the Progress pane.
- The Video Object Class list shows the asset type that you set when your created the asset. Do not change the displayed value.
- Select Yes from the Do Archiving list if you want to archive the uploaded HiRes video. This triggers an archiving process that runs in the background and can be monitored in the Progress pane.
- Select Yes from the Do Proxy Creation list if you want to create a browse proxy from the uploaded HiRes video. This triggers the Create Proxy process that runs in the background and can be monitored in the Progress pane.
- Select Yes from the Do Video Analysis list if you want to start the video analysis for the uploaded video. This triggers the Video Analysis process that runs in the background and can be monitored in the Progress pane. The process creates the Default stratum, the keyframes set, and a thumbnail.
- Select Yes from the Do Caption Extraction list if you want to start a Caption Extraction process. The process runs in the background and can be monitored in the Progress pane. Select Yes only if your Interplay MAM system supports the Caption Extraction feature.
- Select Yes from the Do Quality Control list if you want to run a quality check on the uploaded video. This starts a Baton Quality Control process that runs in the background and can be monitored in the Progress pane. Select Yes only if your Interplay MAM system supports the Quality Control feature.
6. (Optional) Provide metadata for the new asset:
- Type a new title in the Object Maintitle field if you want to change the original main title of the asset. This changes the “Main Title” property of the asset. You do not change the name of the asset reference in the Assets pane. Leave the field empty if you want to keep the original main title.
- Select a value of the usage rights property from the Rights list.
- Type a production number in the Production Number field.
- Type a descriptive text for the asset in the Description field.
7. Click the Upload button in the process dialog box and double-click the file to be uploaded in the Open dialog box.
8. Click OK to close the Upload Video dialog boy and start the upload process.
9. (Optional) Open the Progress pane and monitor the progress of the Upload Video process and its sub-processes. Depending on your selection in the Upload Video dialog box, different sub-processes are shown.
To upload an essence to a non-video asset:
1. Select the new non-video asset, such as an audio, image, or document asset.
2. Do one of the following:
Right-click a selected asset and select Actions.
Click the Pane Menu button and select Actions.
3. (Optional) Select the MAM system on which the process is to be created.
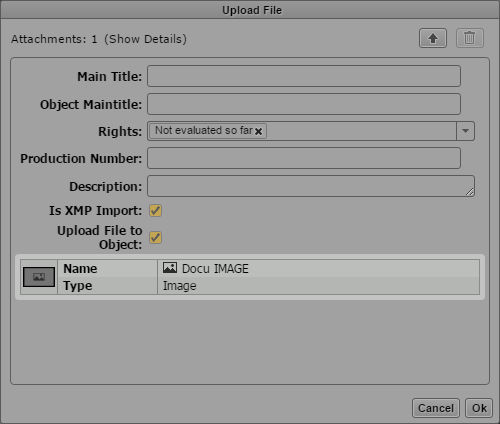
4. Select the Upload File process type and then the “Upload file to object” menu item.
The Upload File process creation dialog box opens.
5. (Optional) Provide settings for the Upload File process:
- Provide a name for the process in the Main Title field. This name is shown in the Progress pane. If you do not type a title, “null” is shown as process name in the Progress pane.
- Type a new title in the Object Maintitle field if you want to change the original main title of the asset. This changes the “Maintitle” property of the asset. You do not change the name of the asset reference in the Assets pane. Leave the field empty if you want to keep the original main title.
- Select a value of the usage rights property from the Rights list.
- Type a production number in the Production Number field.
- Type a descriptive text for the asset in the Description field.
6. Click the Upload button in the process dialog box and double-click the file to be uploaded in the Open dialog box.
7. Click OK to close the Upload File dialog boy and start the upload process.
8. (Optional) Open the Progress pane and monitor the progress of the Upload File process.
- If the file format is supported, the Upload File and then the Import File process are completed.
- If you try to upload a file that is not supported for the asset type, a Approval user task is created.
9. (Optional) Open the Tasks pane, select the “Approve Import to Different Class” task in the Tasks List, and do one of the following:
Click Yes to allow uploading the unsupported file format.
Click No to prevent to unsupported file format from being uploaded and cancel the process.