Publishing from iNEWS to the Web
If you want to publish an iNEWS story to a Web site, you can load the story from your iNEWS queue. This automatically removes production cues, and adds text to some of the fields for your package. You can then modify your story, select a profile, add a video clip or an image, and send the story out for approval for publication.
If you selected the option to transform iNEWS stories to lowercase in the System Settings, all text changes to lowercase characters. You can use the rich text editor in the Web Story pane to modify the capitalization of text in your story.
If you have configured a WorldNow CMS profile, you can use the Web Story layout to specify a number of WorldNow categories for your media package. For more information, see
Publishing MediaCentral Assets to a WorldNow CMS.
To prepare an iNEWS story for publishing to the Web:
1. Click the Layout selector and select Media Distribute.
The Media Distribute layout opens.
2. Do the following to open a story in the Queue/Story pane.
a. Double-click an iNEWS server in the Launch pane.
The folder hierarchy of the iNEWS database displays in the Assets pane.
b. Double-click a queue in the Asset pane.
The queue’s contents open in the Queue/Story pane.
c. Select the story in the queue you want to view and click the Story button to display the story in the bottom half of the Queue/Story pane.
3. Click the Panes Menu button and select Web Story.
The Web Story pane opens. The options available depend on which Web CMS settings your MediaCentral administrator has configured.
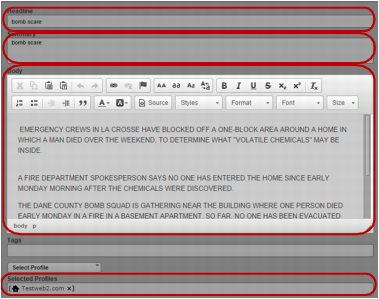
Web Story pane: Headline, Summary, and Body text boxes; Selected Profiles
4. Click Load iNEWS Story.
The Title and Lead text boxes display the story slug, and the Body text box displays the iNEWS story, including all segments. If you selected the option to transform iNEWS stories to lowercase in the System Settings, all text changes to lowercase characters.
5. (Optional) Add, delete, or modify text in the text boxes for the story title or headline and any other text boxes. The fields requiring text depend on your Web CMS configuration.
The Body text box includes a rich text editor that allows you to edit your content and to format text to match the styles used on your Web site. You can also use the Source button to view the HTML markup for your story.
6. Click the Profiles menu, and select a profile. You can select multiple profiles for each target.
Profiles display in the Selected Profiles area.
| System profile |
| System profile with video transcoding |
| User profile |
If you want to delete a profile, click the “x” next to the profile name.
7. To add a video to your package, do the following:
a. Double-click a sequence in the Asset pane or drag the video asset to the Media viewer.
The video asset displays in the Media pane.
b. If you do not want to add the entire video to your package, set In and Out points in the Media pane and create a subclip and then load the subclip in the Media viewer.

You can also add a sequence to your package. For information on creating sequences, see “Creating a Sequence” in the
Avid MediaCentral | UX User’s Guide.
c. If your CMS supports video profiles, click the Video Profiles menu, and select a profile. You can select multiple profiles for each target.
d. If necessary, add or update any metadata to the Web Story fields that require information, depending on your Web CMS configuration — for example, associated links or alternative text for graphics.
e. Click Load from Player.
The video displays in the Video or Image area of the Web Story pane. The position indicator in the Media viewer determines the video poster frame that appears on your Web page.
f. (Optional) If you want to use a separate image to display in the Video area as the poster frame for you video, load a new video in the Media viewer and then click Load from Player. This allows you to use a poster frame that does not appear in the video for your package. You can also use a separate image from your local system by clicking Load from local drive.
g. If your CMS supports additional graphics content — for example, branding, header, or Story Body graphics — you can move the position indicator in the Media viewer and then add the new image to the appropriate field in the Web Story pane.
h. If your video includes closed captioning information, click the Attach Closed Captioning button.
Closed captioning information is added to the media package, and the Attach Closed Captioning button changes to the Remove Closed Captioning button. You can remove closed captioning from your package by clicking Remove Closed Captioning.
8. Click Send draft.
The story is sent for approval and the Web Story pane clears all fields. For information on approving stories for publishing, see
Review and Approval.