Viewing Interplay | MAM Thumbnails
The Thumbnails pane lets you display a series of small images of an asset. In an Interplay MAM context, these are referred to as “keyframes” that are displayed in Interplay MAM Desktop’s Lighttable view. In MediaCentral UX they are referred to as “thumbnails.” Viewing and double-clicking thumbnails can help you navigate through video assets more quickly. You can view thumbnails in the following arrangements:
• Time-based: Shows the first frame of the asset, the last frame of the asset, and a frame at the frequency that you choose. The exact frame displayed depends on the type of timecode (drop-frame, non-drop frame, 24 fps, and so on). Timecodes are displayed beneath each thumbnail, reflecting the timecode display that is set in the Media pane: Master, Absolute, or Remain.
• Marker-based: Shows any thumbnail that is extracted by the Interplay MAM Video Analysis or a user in Interplay MAM Cataloger. You can adjust the quantity by applying a marker-based filter.
• Both time-based and marker-based thumbnails.
The following illustrations show each of these arrangements: time-based, marker-based, and both.
Note the following:
• You can show thumbnails for video assets.
• The size of the thumbnails depends on the aspect ratio selected in the Media pane. Changing the aspect ratio changes the size of the thumbnails.
• Currently, you cannot adjust the size of the thumbnails.
• Click the Refresh button to update the display for changes to the asset, for example, if a user has extracted new thumbnails in Interplay MAM Cataloger.
• If the entire keyframes set is deleted in Interplay MAM Desktop, you can only show time-based thumbnails in the Thumbnails pane.
To view thumbnails:
1. Select Panes > Thumbnails.
If an asset is already loaded in Asset mode in the Media pane, thumbnails are displayed in the Thumbnails pane.
2. In the Assets pane, double-click a video asset.
The asset is loaded in the Media viewer and thumbnails are displayed in the Thumbnail pane, with timecode for each thumbnail below it.
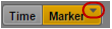
3. To show only time-based thumbnails, click the Marker button so that it is inactive. To show only marker-based thumbnails, click the Time button so that it is inactive.
4. To navigate to a particular frame in the Media pane, double-click a thumbnail.
The position indicator in the Media Timeline jumps to the frame.
To apply a time-based filter:
1. To show only time-based thumbnails, click the Marker button so that it is inactive.
2. Use the slider to select one of the following frequencies:
- one frame every 10 seconds (default setting)
- one frame every 1 minute
- one frame every 5 minutes
- one frame every 10 minutes
The Thumbnails pane shows the thumbnails that match the selected frequency. This setting persists from one session to another.
To apply a marker-based filter:
1. To show only marker-based thumbnails, click the Time button so that it is inactive.
2. Click the arrow in the upper right corner of the Marker button.
The Add or Remove window opens.
3. Select the filter you want to apply or deselect the filter you want to cancel:
- All: Shows all marker-based thumbnails. Includes all other filter criteria.
- User: Shows the thumbnails that are extracted by a user in Interplay MAM Cataloger.
- Shot Boundaries: Shows the thumbnails that are extracted by the Video Analysis for shot boundaries.
- Low: Shows the thumbnails that are extracted by the Video Analysis already for small changes in image content.
- Medium Shows the thumbnails that are extracted by the Video Analysis during medium alteration in image content.
- High: Shows the thumbnails that are extracted by the Video Analysis only when the image content changed significantly.
4. Click the Close box or click anywhere outside the window to save your settings.
The Thumbnails pane shows the thumbnails matching the selected filter. This setting persists from one session to another.