Creating Assignments
The Assignments list includes the following components:
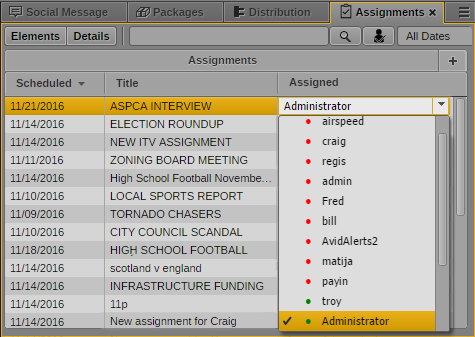
• Scheduled — the time and date that the assignment is due
• Title — the title or story slug for an assignment
• Assigned — the primary MediaCentral UX user responsible for the assignment
When a user is attached to an assignment, the assigned user receives a message with a link to the assignment in the Assignments pane when a new assignment is created. For information on using MediaCentral UX messages, see “Sharing MediaCentral | UX Messages” in the Avid MediaCentral | UX User’s Guide.
To create an assignment
1. Do one of the following:


Click the Add Assignment (+) button.
Press Alt+n
Press the Insert key.
A new assignment appears at the top of the Assignment list, with the current date in the Scheduled column and the user name of the currently logged in user in the Assigned column.
2. If you want to set a date for the assignment to be completed, click the date in the Scheduled column and select a new date.
3. Click the Title column and type a name for the assignment.
4. Click the Assigned menu, and select the MediaCentral user for whom you want to assign the story.
5. Click Ctrl+S, click another assignment, or click outside the Assignments pane to save the new assignment.
The assignment appears in the Assignments list. If you have configured e-mail notifications for the MediaCentral UX user in the Assigned column, the user receives an e-mail notification with a link to the assignment.
For more information about configuring e-mail notifications, see “Configuring Messaging” in the Avid MediaCentral | UX Administration Guide.