Creating a New Group or Editing Group Details
To create a new group:
1. Sign in to MediaCentral UX as an administrator and select Users from the Layout selector.
2. Do one of the following:

In the user tree, select the top-level group (Users) or another group to which you want to add a new group, right-click, and select Create Group.
The new group will be added to the selected group.
Click the Create Group button.
Click the Pane Menu button and select Create Group.
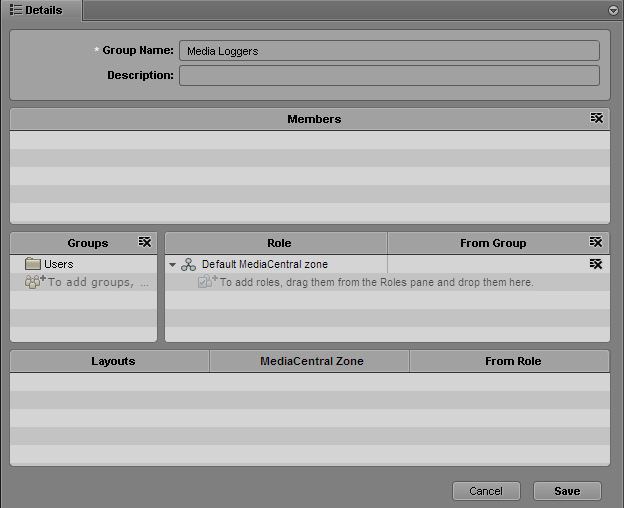
3. In the Details pane, type the properties for the new group.
Group Name is a required field (marked by a white star). Other fields are optional.
4. Add members to the new group by dragging users from the user tree to the Members section.
Use Ctrl+click (Windows) or Command+click (Macintosh) to select multiple users, or Shift+click to select contiguous users.
To remove a user from the group, do one of the following:
- Click the x next to the user’s name
- Select one or more users, right-click, and select Remove from Group.
- Select one or more users, right-click, and press the Backspace key or the Delete key.

Removing a user through these actions does not delete the user from the database. You can delete a user or group from the database only through the user tree. See
Deleting Users and Groups.
5. Assign one or more roles to the group.
By default, the group inherits the roles assigned to the parent group, unless the parent group is the top-level Users group. The top-level group cannot be assigned a role.
By default, members of the group inherit the roles assigned to the group. If you are working in a multi-zone environment, assign the appropriate role for each zone. For more information, see
Creating, Deleting, and Assigning Roles.
6. (Optional) If you want to make the group a member of another group, drag the new parent group from the user tree to the Groups section. To remove the parent group, click the x next to the group’s name.
7. If you want to clear and close the Details pane before creating the group, click Cancel.
8. When you are satisfied with the information, click Save or press Ctrl+S.
To edit group details:
1. In the user tree, double-click a group.
2. Change the properties, membership, or roles.
3. If you want to cancel your changes and return to the last set of saved information, click Revert.
4. When you are satisfied with the information, click Apply or press Ctrl+S.